Showing posts with label bread. Show all posts

November 3, 2011

Pumpkin Knotted Dinner Rolls


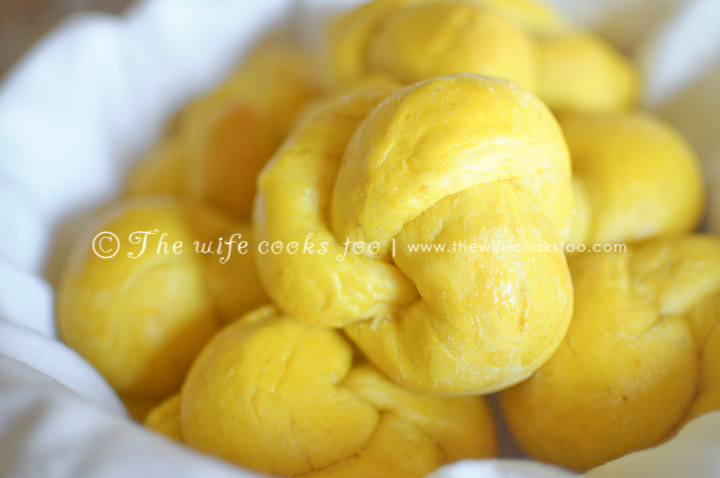
October's Artisan Bread Baker's BOM (Bread of the Month) was Pumpkin Knotted Dinner Rolls. These rolls were so amazing, that I'll be adding them to my Thanksgiving menu. The name says pumpkin, but they do not actually taste like pumpkin. Instead of pumpkin flavor, the pumpkin puree makes these rolls incredibly moist. They will be perfect rolls for soaking up some good Thanksgiving gravy! The recipe is from here. You can even change the serving size on the recipe site. I made 24 and I wouldn't recommend less. Trust me, they are that good. I individually wrapped the extra rolls with plastic wrap, put them in a freezer bag, and froze them. They held up great. If I knew I was going to want some for dinner, I just took them out in the morning and let them defrost on the counter. Of course there were the times I wanted one right then and there, so I would just put one in the microwave for 15 seconds. Microwaving frozen bread isn't my preferred choice, but it worked fine with these rolls.


Ingredients
(for 24 rolls):
1/2 ounce active dry yeast
1 cup warm 2% low-fat milk (110-115 degrees F)
1/3 cup unsalted butter, softened
1/2 cup sugar
1 cup canned pumpkin puree
2 eggs
1 teaspoon salt
5 1/2-6 cups flour, divided
EGG WASH
1 tablespoon cold water
1 egg

I must admit, I'm not a big fan of bread recipes that aren't measured by weight. So, my next batch I'm going to weigh the dry ingredients. I'll be sure to add the weight for my fellow bread baking snobs. ;)

Now for a trick of the trade moment. Is 'trick' the right word? *Scratches head* My chef husband taught me there is a correct way to measure dry ingredients when not measuring by weight. Scoop, pour, and scrape. You should never use the measuring cup to scoop from the bag, but instead use a spoon or cup to scoop the dry ingredients into the measuring cup.

I always put my measuring cup in a bowl and over fill it with a heaping spoon full of the dry ingredient. I then take the back of a knife and scrape along the top of the cup. Do not tap the cup. This will cause the ingredient to pack and will give you too much of the ingredient. [Unless the recipe calls for the dry ingredient to be packed.] I know to some this may seem a bit too picky, but I'm a picky baker and like to get consistent results. It's this pickiness (or if you prefer...OCD tendencies) that makes me happy I married a chef. He gets it. Not to mention I get to learn what the pros do. Many times I get to 'learn' even when I don't ask....but hey, that's for a different post, or maybe even for a different blog all together. ;)


Directions (taken directly from the recipe source here):
1. In a large mixing bowl, dissolve the yeast in the warm milk. Add butter, sugar, pumpkin, 2 eggs, salt, and 3 cups flour. Stir in enough of remaining flour to form a soft dough. Turn onto a lightly floured surface----knead until smooth and elastic-like (should take about 5-7 minutes). Place in a large greased bowl and turn once to grease top. Cover with a clean towel or paper towels and let rise in a warm place until doubled---takes about 1 hour. Punch dough down; turn onto lightly floured surface; divide in half. Shape each portion into 12 balls (so you'll have 24 balls total). Roll each ball into about a 10" rope; tie into a knot and tuck ends under. Place 2 inches apart on greased baking sheets. Cover again with towels and let rise until doubled---takes about 30 minutes.

2. Meanwhile, in a small bowl, whisk together water and 1 remaining egg. When rolls are done doubling again, brush them with the egg wash. Bake at 350 for about 15-16 minutes or until lightly golden brown. Remove and serve or place on wire racks to cool slightly. Serve warm or cooled with butter.


I put a post-it on my proofing container to mark where the dough started. This makes it easier to tell if the dough has double. You could also use tape, but sometimes it's hard to get the tape off.


These rolls are not only delicious, they look beautiful. Now is everyone ready to go make these? You really should! If you have children, they would probably have a lot of fun making the knots.


On another note, my blog is getting a make-over! I've been working on a fresh new look! I will hopefully have it completed by the end of next week. If all goes well that is. I am also moving it over to blogger, but I'll post all that info once I've moved everything over and have finished the new look. So please stay tuned! :)

July 30, 2011

Cinnamon Pull Apart Bread


Earlier this year I joined a group Artisan Bread Bakers on Facebook in hopes to do their monthly challenge. Well....here it is July and I finally did a monthly challenge. I'm so glad I did! July's monthly challenge was Cinnamon Pull Apart bread and it was divine! Definitely not the bread to have around the house while on a healthy diet. It didn't make it past 2 days in our house, and there's only two of us.

The recipe I used is from here. The recipe itself is fairly easy. The assembly may seem daunting, but is actually easier and not as time consuming as it may seem. I've included a few tips here that may be helpful.


Dough Ingredients: all-purpose flour, sugar, yeast, salt, unsalted butter, milk, water, vanilla extract and eggs.


The recipe says to combine the flour, sugar, yeast and salt, but I first mixed the yeast with the flour and then added the sugar and salt.  If the yeast comes in direct contact with the salt, it will kill the yeast. I'm sure it'll come out just fine following the recipe instructions, this is just a tip I've learned and it's become a habit.


Pretty dough. :) I'm sure I've mentioned this before, I let dough rise on top of the refrigerator due to it usually being a bit warmer in this area.

I forgot to take a picture of the beautiful rise, but here it is outside of the proofing container.


Filling: sugar, ground cinnamon, grated nutmeg, unsalted butter

I used a shaker for the mixture for easier sprinkling.


The mixture is far too delicious to let any go to waste, so I used a pastry brush to sweep up the spill over and sprinkled on top.


Yes, I measured perfectly. ;)


The stacking is a bit challenging since the dough is so soft. I used a palate knife (cake frosting spreader) to lift the strips which was very helpful. I then slid the pile closer to the next strip after each layer was stacked. A little sweep-up of the filling mixture that fell off and add back on top after each layer.


Disaster almost happened. Be sure to have your loaf pan ready to go and within arms reach. I didn't! I tried to get creative making sure my stacked pieces didn't tumble over.....it didn't work. No pieces fell to the floor and all was saved though. *whew*


Simply divine!!! I'll be making this bread again (and again)!


January 16, 2011

2 | 36 Pugliese Bread & Off Topic Note

Bread 2 of 36, Pugliese Bread. Pugliese bread is an Italian bread from Puglia and is almost identical to ciabatta bread, but is heavier and has smaller holes. (My husband has been asking me to make ciabatta bread since the beginning of my bread baking, so this bread will be coming very soon.)

Pugliese bread is a very wet dough which can be a bit difficult to work with. Overall, I'm pretty happy with the results.

Recipe from The Bread Bible by Rose Levy Beranbaum


The Dough Starter (Biga) Ingredients: unbleached all-purpose flour, instant yeast, water.


Mix ingredients with a wooden spoon, cover, and let rise till tripled in size (about 6 hours).


I don't really think it tripled, but I decided to proceed. (Room temperature can make a significant difference in the rise. Our thermostat is usually set at 64 degrees, and for bread rise, the ideal room temperature should be around 70ish. I think this made a difference. I did actually mean to bring up the temperature, but forgot. oops!) Once it's tripled in size, you can also refrigerate it up to 3 days. I refrigerated it overnight since I read this helps with the flavor development.


Dough ingredients: unbleached all-purpose flour, durum flour, instant yeast, salt, water and the biga.


A business letter fold. Oh the terms I'm learning! Trying to explain is a much bigger challenge. (I'm also now realizing I should of used a different angle for this picture to help with the explanation.) A business letter fold: stretch the dough into a rectangle and then fold in thirds, like a business letter. Hopefully that makes a bit of sense. This gets done three times with a 30 minute rest after the first two folds, and a 2 hour rest after the third fold.


Shaping and final rise. Round the dough and place seam side up in a banneton, or in my case a colander with a heavily floured towel.  If the towel is not flowered enough, the dough will stick. Let rise till it has increased about 1 1/2 times (about 1  1/2 hours).

I've been discovering a lot of bread baking tools I'd like to have, one being a banneton which is a dough rising basket. A colander can be used here instead. The banneton (or colander) is used to help give the dough support during the final rise since this is a very wet dough and will spread, (There are several types of bannetons used for different purposes. Another type of banneton is used for decorative purposes. I hope to get one of these soon to try. )

Getting the dough out of the colander was a bit tricky. I'm really glad I followed the suggestion in the book. It's very important not to deflate the bread at this point. The book suggests if the colander is too tall, to cut a piece of cardboard into a circle slightly smaller than the colander. Before flipping the bread over, hold the cardboard directly above the dough as close as possible without actually touching the dough. Then flip the dough over. The dough will fall nicely on the cardboard without deflating. Then you just transfer it from the cardboard. (This is when I wish my husband was around to take pictures so you could actually see what I mean. Hopefully you get the picture.)


The bread! The crust came out wonderful. How does one get a beautiful crusty crust? Steam (at least that's what the pro's seem to be saying). I've read several steaming techniques. Of course you could buy a really (really) expensive oven that has a steaming devise, but being just a home baker.....well, need I say more. I decided to go with what seamed to be the safest technique. Some of the techniques had severe warnings about the possibility of getting your face burned. (No thank you.) I use a sheet pan and ice. I place a sheet pan on the lowest shelf while the the oven is preheating. (Let me digress for a moment. I also have the baking stone in the oven during preheat and I preheat the oven for at least an hour.) Once the bread is ready to bake, the next two steps have to be done as quick as possible to not let out too much heat from the oven. I first transfer the bread to the baking stone, and then throw 1/2 - 1 cup of ice in the sheet pan and quickly close the oven door. That's it. Done. Now I was expecting to actually see steam. I got worried it wasn't working when I didn't see any, but it works.

Only 2 breads (well, as of yesterday 3), and I can't believe how much I'm learning. And on the flip side, I can't believe how much there is to learn. Bread baking is truly an exciting and challenging  journey.
*****

Completely off topic, I really enjoy the blogging world. I had a bit of a disheartening situation that caused me to step back, and almost reconsider this blog. It was through reading other blogs that I realized what a shame that would be if I allowed someone else's opinion to stop me from doing something I enjoy. The blogging world is a bit of a community, and I've meet some wonderful people through blogging. I really enjoy reading what others are sewing, crafting, taking pictures of, cooking, baking, etc. And so many people have inspired me through their blogs. I don't really feel what I blog is very inspiring, but I truly enjoy it. This has also been a fantastic learning tool for myself. When I look at the pictures and try to describe what was happening, or what technique I used, the information actually sticks in my brain!  :)

So thank you my fellow bloggers for sharing pieces of your life with the rest of the world!